|
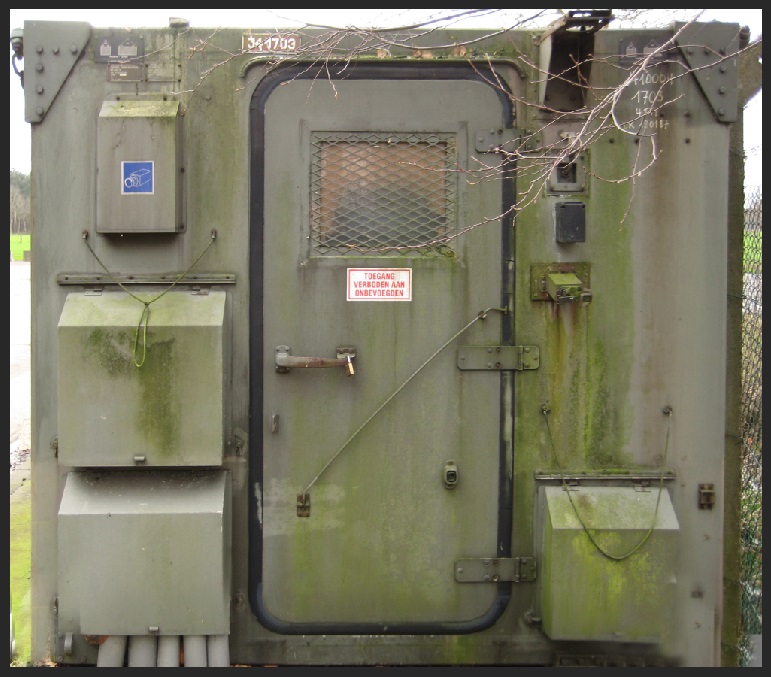
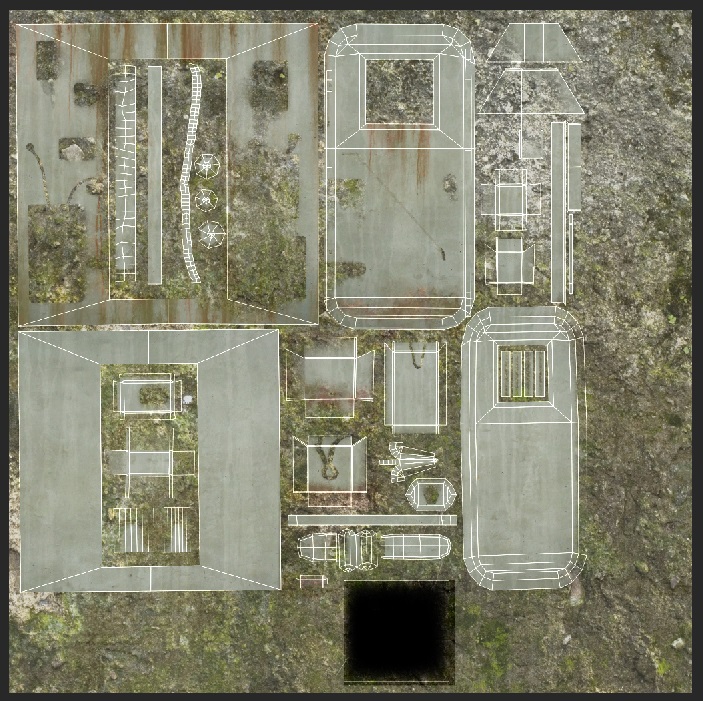
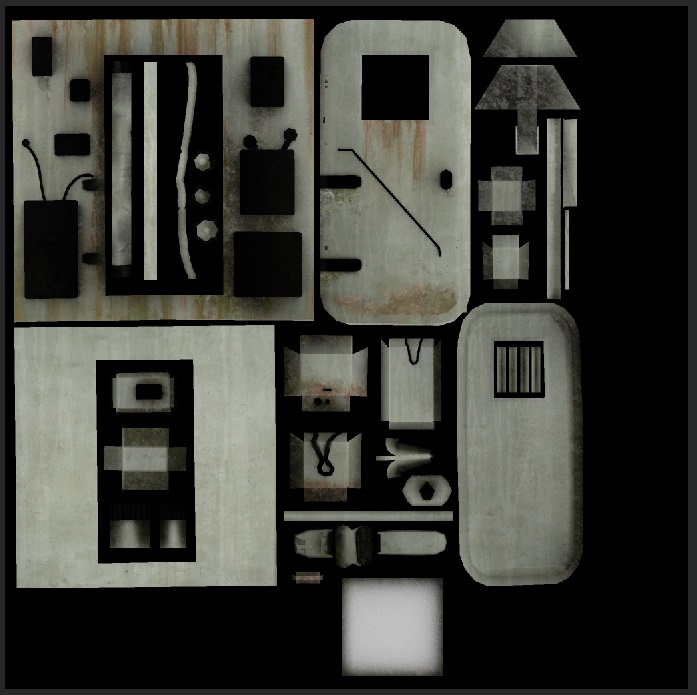
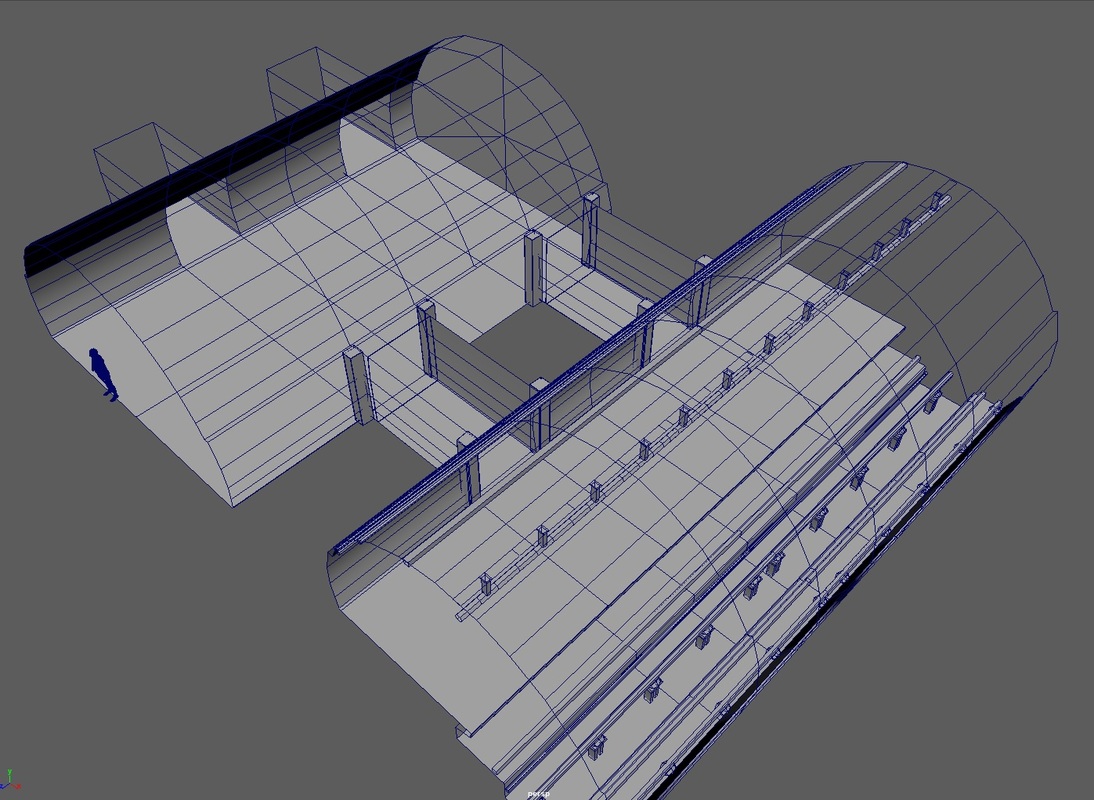
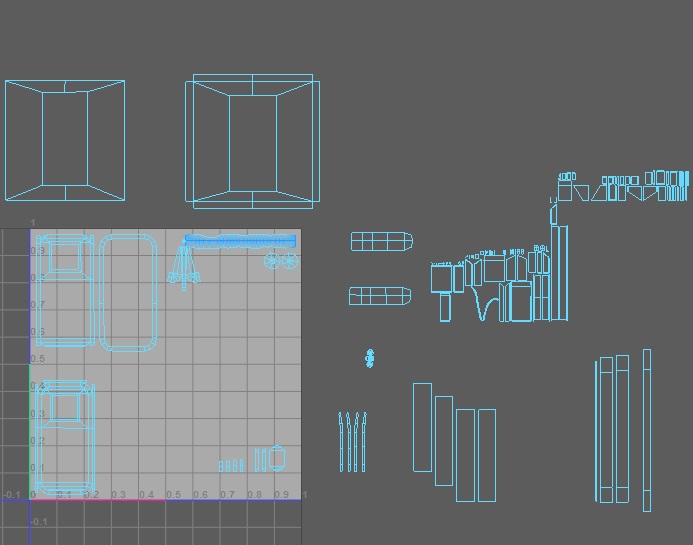
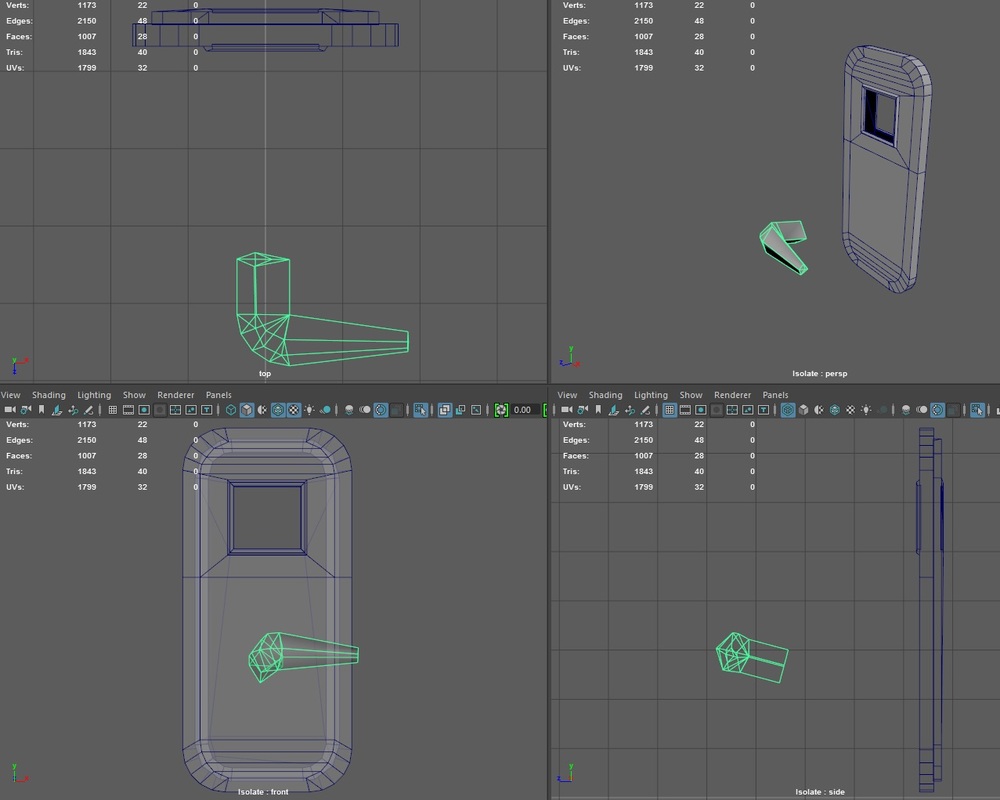
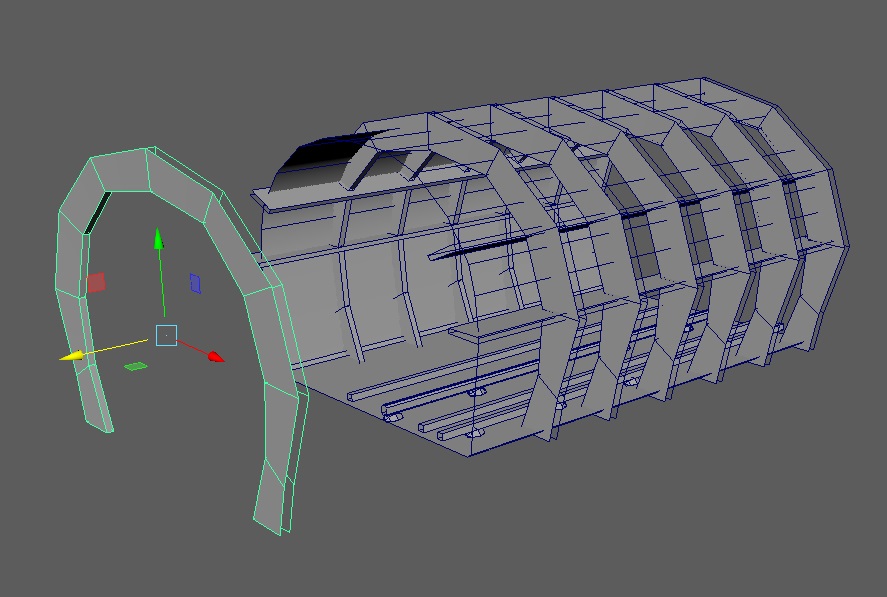
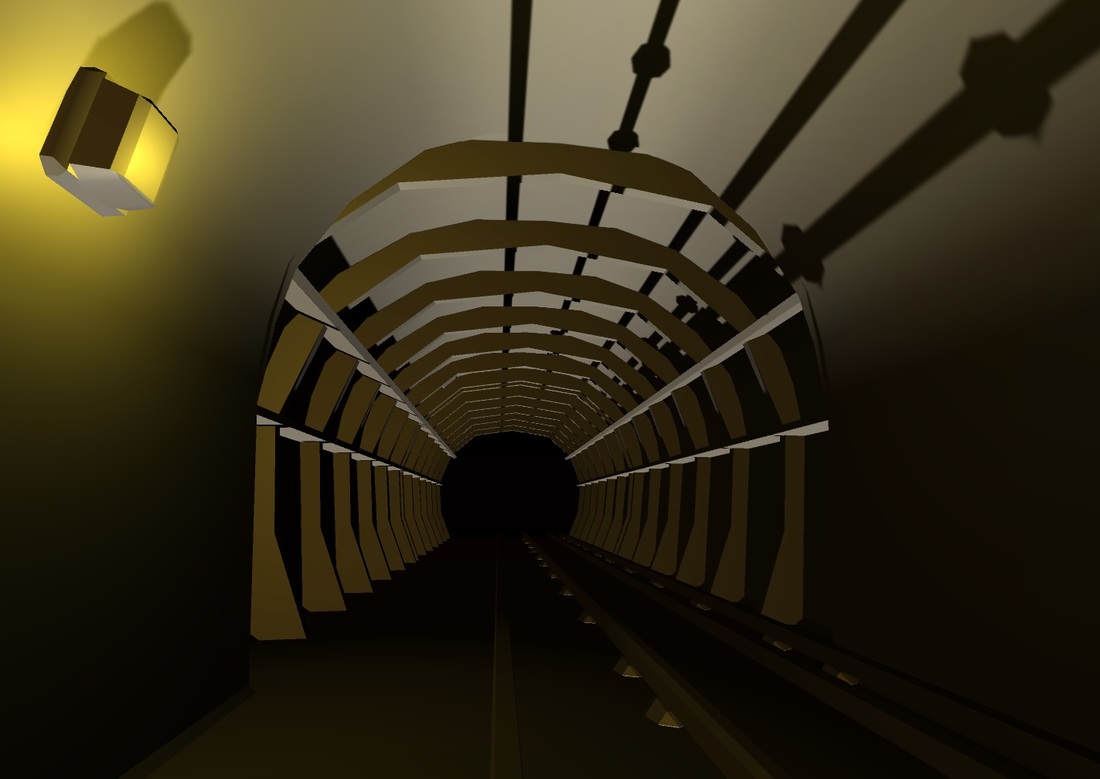
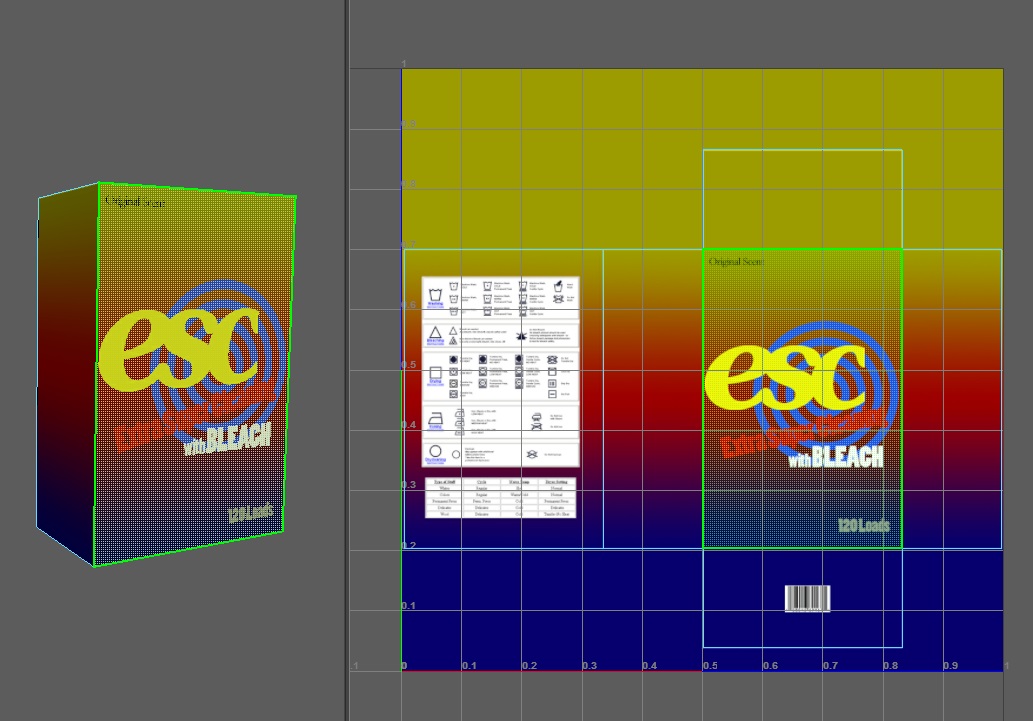
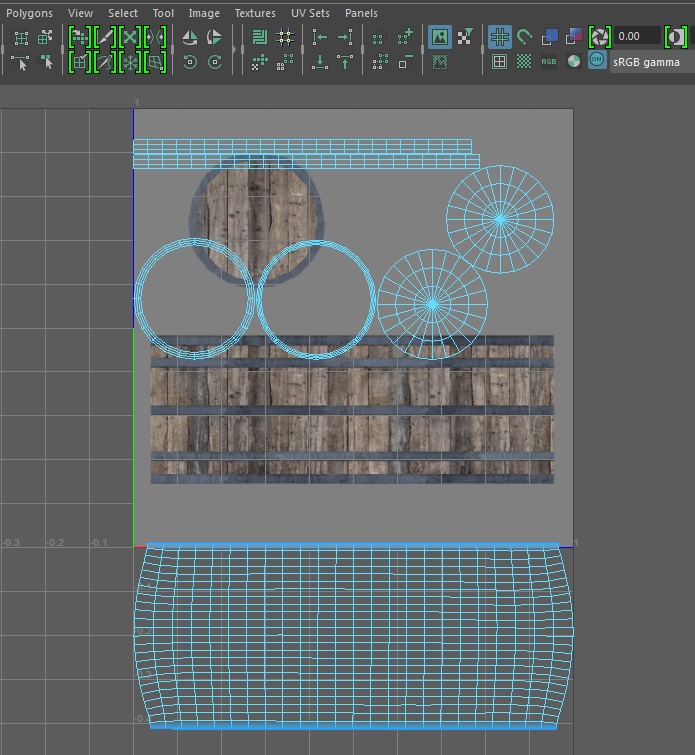
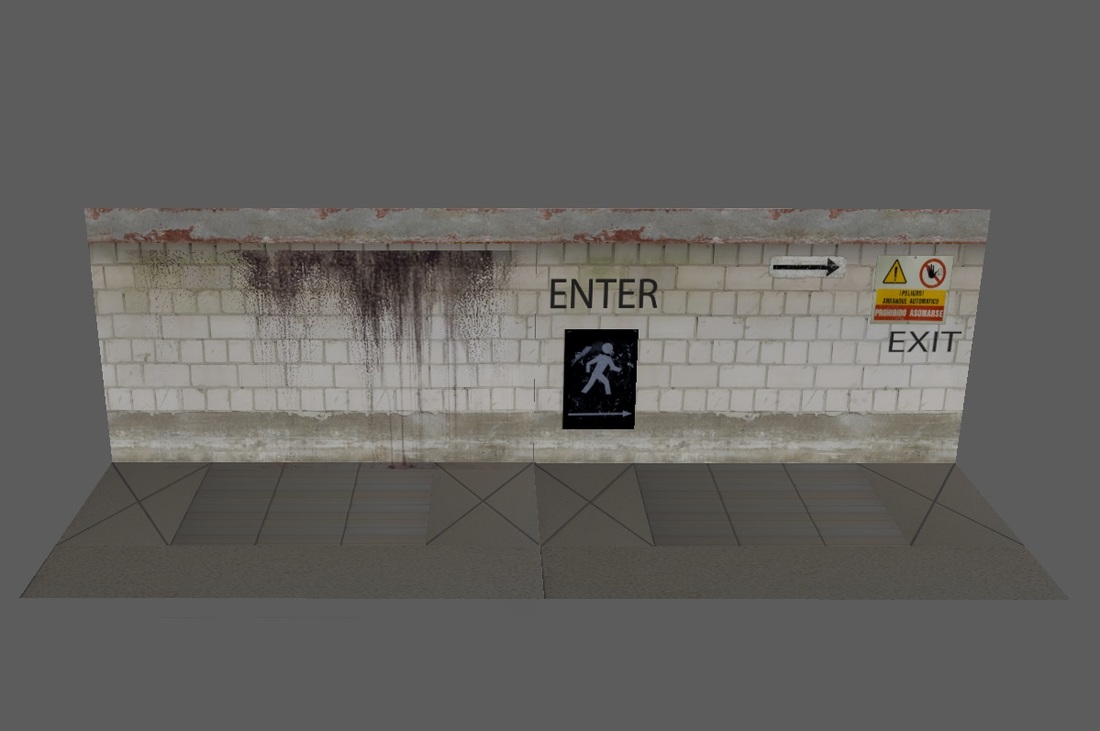
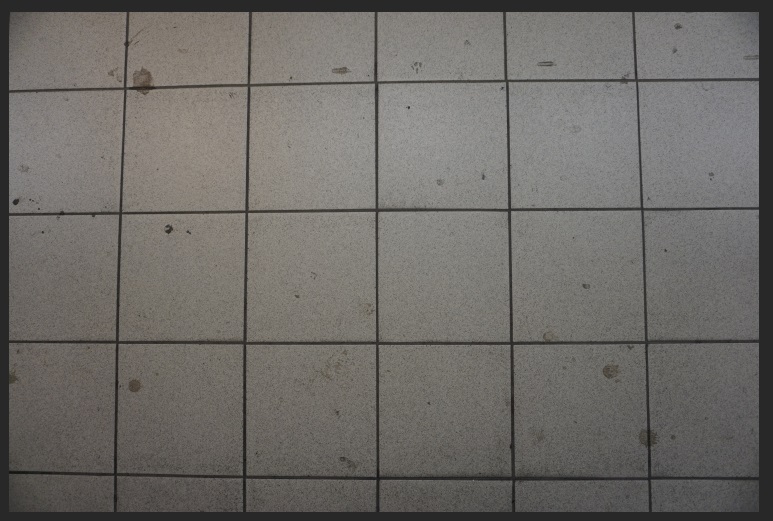
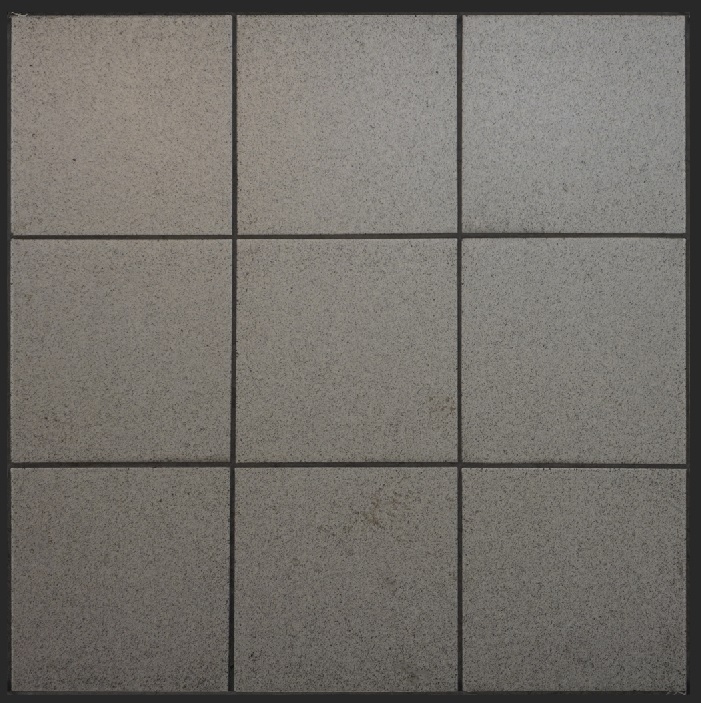
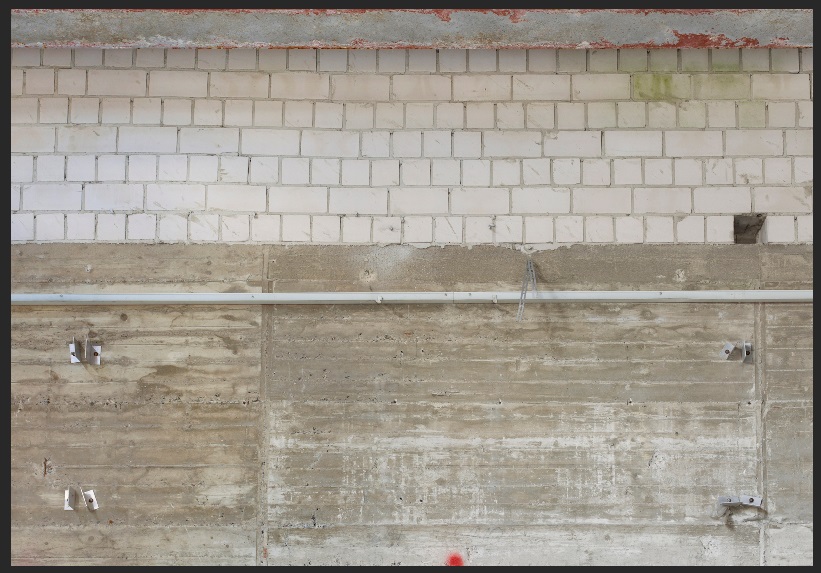
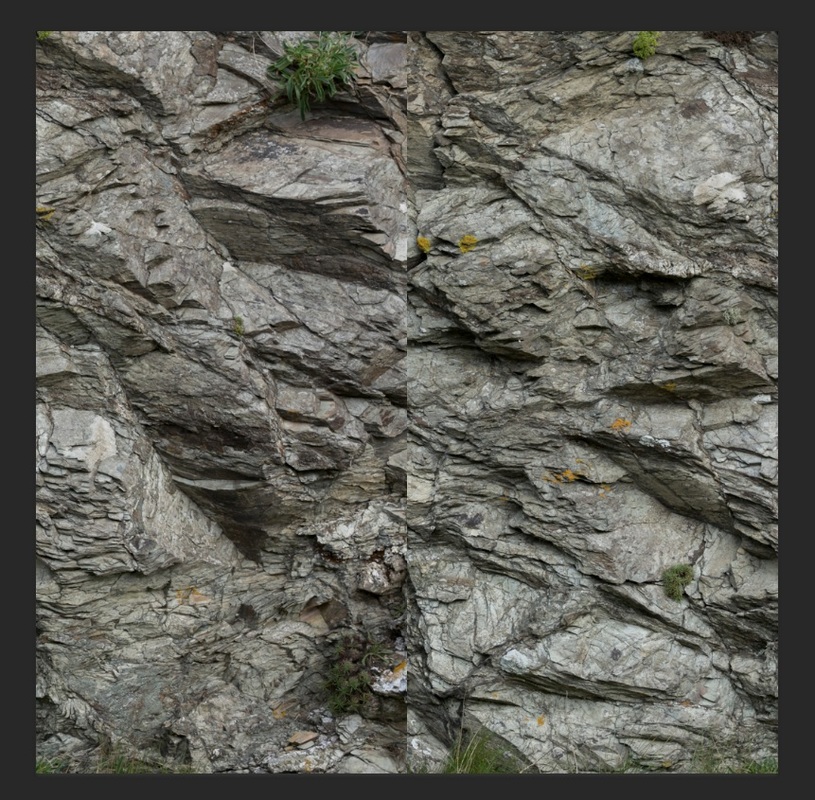
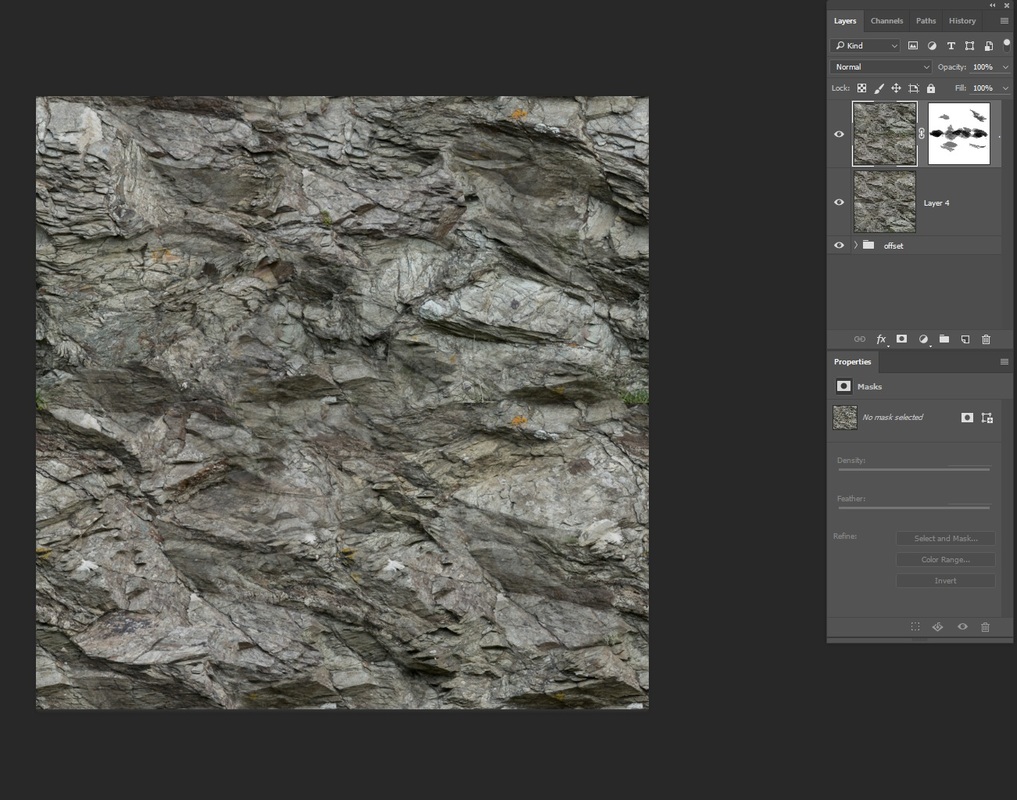
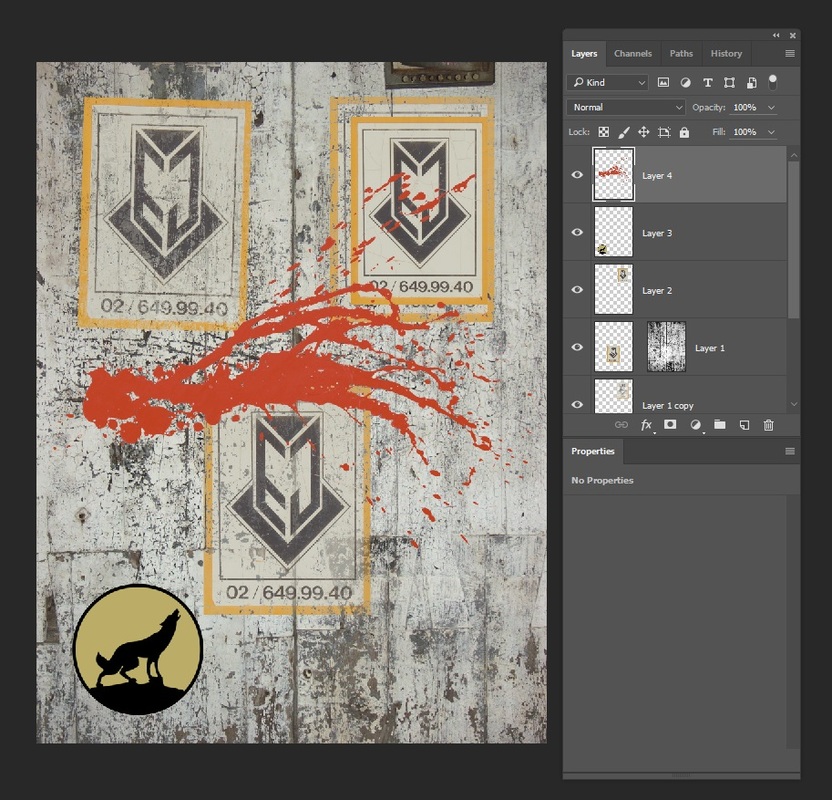
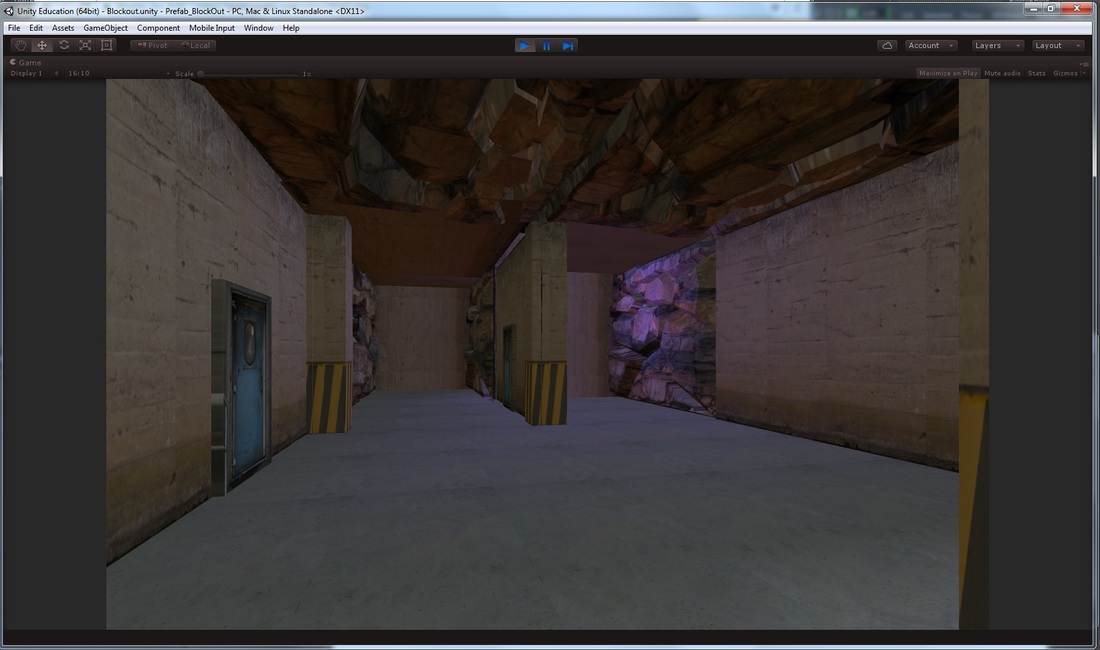
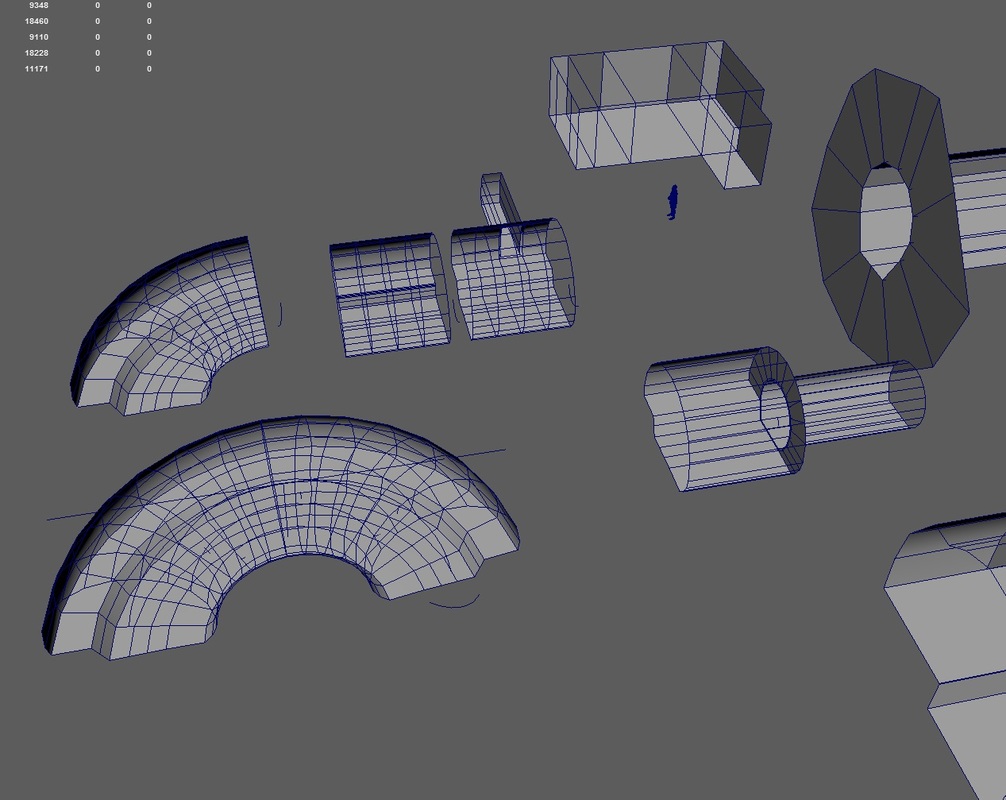
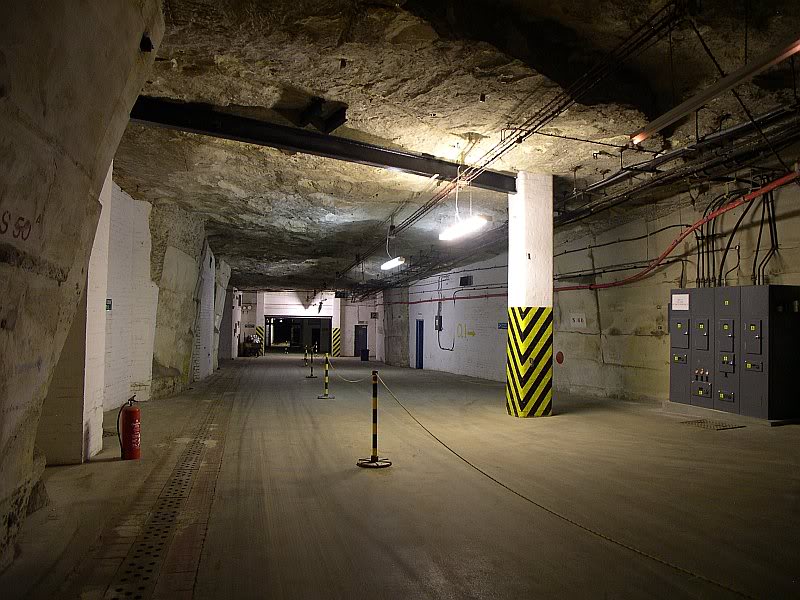
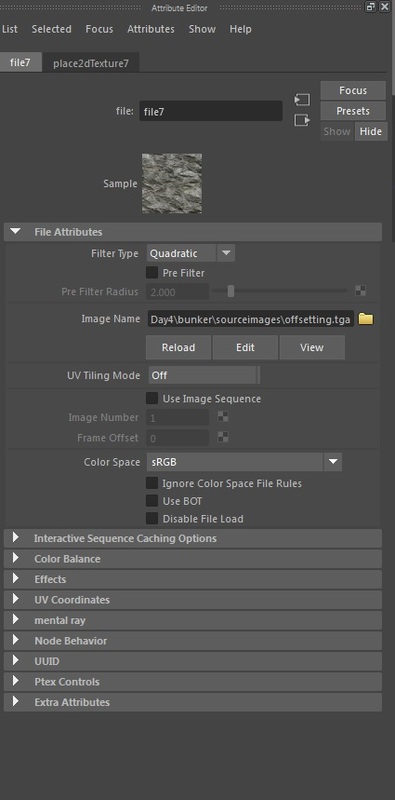
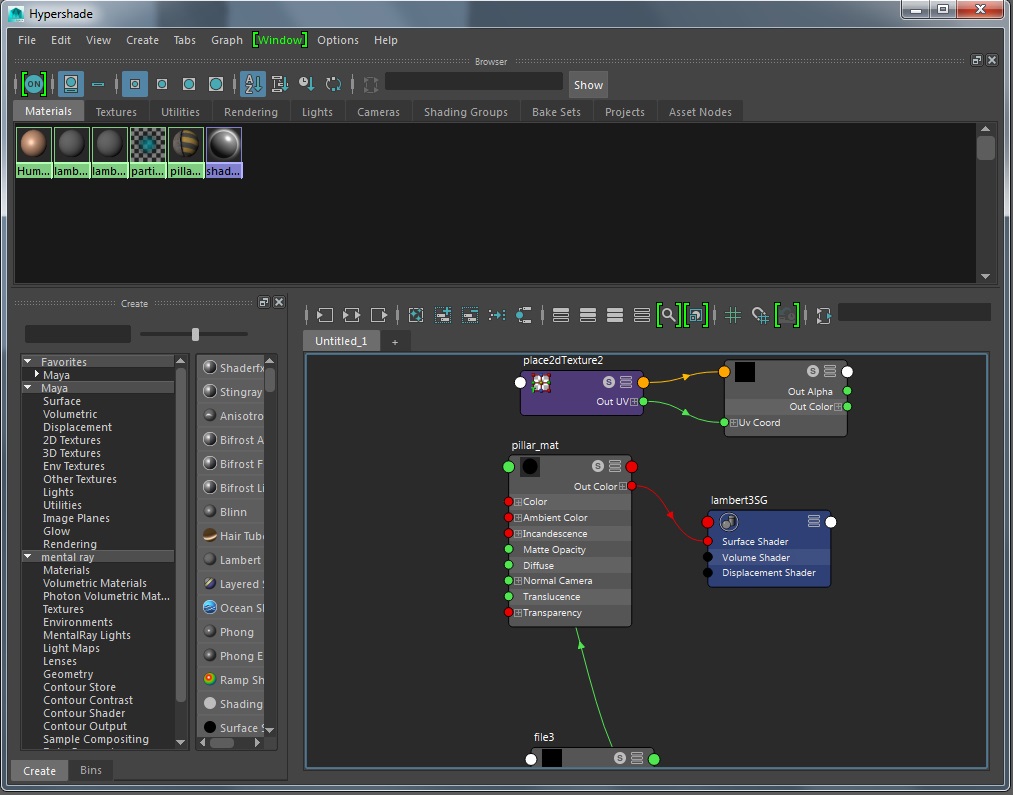
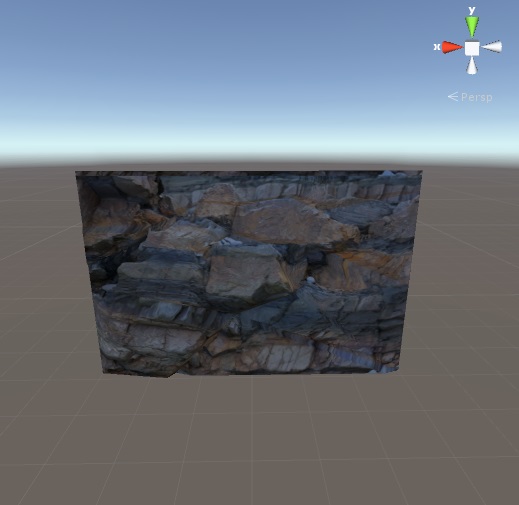
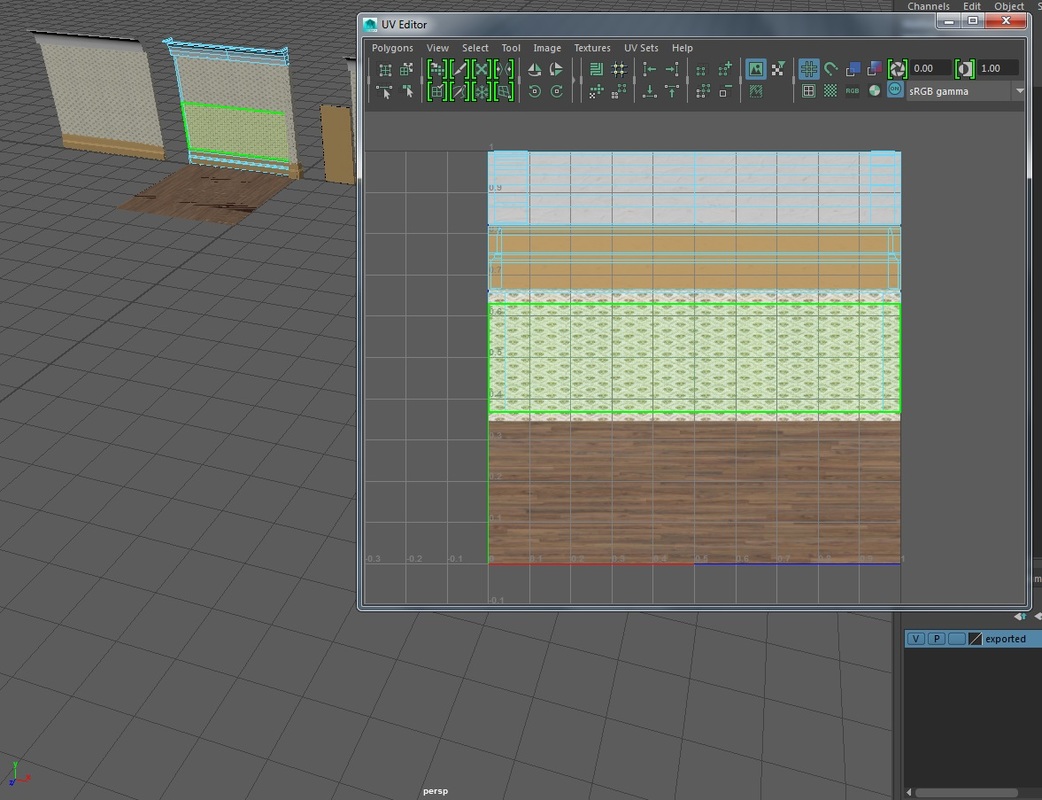
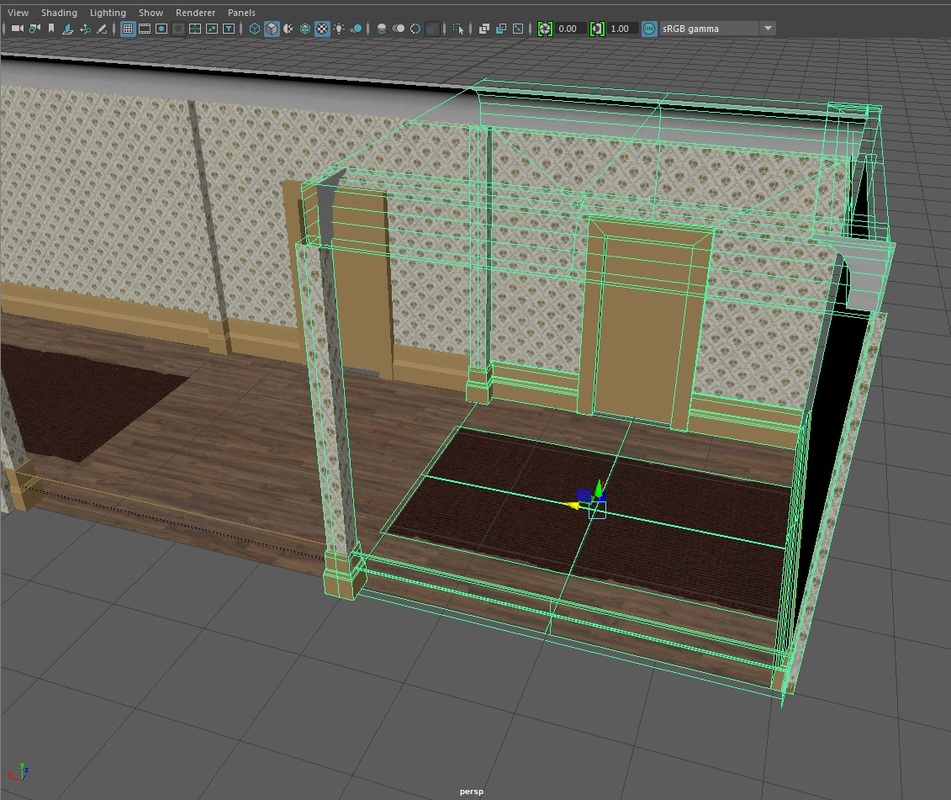
Todays lesson was to UV a blast door. We spent the morning analyzing and modelling a blast door from the image. I used the bevel tool to create the round corners of the door and extruded in by offsetting to create an inner edge. I continued to work on my tube. I was quite happy with the platform and decided to move onto the tunnel piece. It was tricky as the structure of the inner ridges are quite polygon intensive so I had to plan an approach to try and minimise the amount of polys and to make it match the reference image as much as possible. Below is the most recent version of the tunnel, I created the small pieces to act as the ridges of the tunnel and it turns out surprisingly well. Today was a really full on day all about UVs. We started day getting to grips with some of the tools and the process of how unwrapping UVs work. In pic1, we used a template to map the image to the cube. Simon told us there are many ways to try and maximise spacing efficiency on the UV map. If a face is the same, I can use overlap both faces together so they share the same space. UVs is a vital step in becoming a good modeller and there are a number of tools in the UV panel which makes unwrapping and packing much easier. We looked at UV-ing a barrel and came across issues where the texture is stretching due to the shape of the UVs. Simon advised that we need to find a way to relax the faces of the UVs to fix this. A new feature is added for Maya 2016 and that is the cut UV tool and the sew UV tool, sewing together UVs can save vertices as it merges them together but sometimes it is necessary to keep them separate to preserve the texel density. There are so many tools to get used to in the UV panel but it was very interesting to see how each one can help with the UV-ing process. I still need to familiarize myself with selecting the UVs as I get confused sometimes by accidentally selecting the actual model rather than the UV itself. To continue where we left off from yesterday, we looked at UVs and decals. I set up my panels in Maya so I can view the UV editor and the perspective view. It is possible to assign different materials for different faces in the same mesh. I used the wall texture created yesterday to create a simple wall. Simon then went through all the features in the UV editor, how to move shells and adjust the UV. We will be learning more about the UV editor throughout this week. Simon explained what texel density is and why it is important when UV-ing. It is basically to ensure there is enough image information when it is projected onto the model and the faces. I gathered images of signs (see pic1) to use as decals for the wall. But firstly I had to edit the images, remove the white background in some images. To do this, I used the alpha channel technique to ensure the images are clean. Remember. White = opaque/solid and black =transparent. Then I assign the image file (Targa) to the material in Maya. Decals are useful in conjunction with the tile texture and it breaks up the repetition on the pattern and creates variety for the player. In pic3, I added some dirt using the same technique on the wall as well which looks pretty convincing. Useful information: Textures.com We delved deeper into Photoshop today. I showed Simon an image I took in the underground station (pic1) and he explained to us the dos and don'ts when taking a nice photo for texturing. I could get better results if I stood back and zoomed into the image which results in a less distorted image. There are tools in Photoshop that can be used to edit the image and to straighten out the distortions. I was introduced to the lens correction tool which allows me to state the lens of the camera used and remove the lens distortion, or alternatively use the custom options it provides to manually re-adjust it to my liking. The second image was the end result of this, I managed to remove the slight perspective and flattened it out so I could use this as a tiling texture. Next we looked into ways to edit an image. One thing to avoid when creating a tiling texture is any bold areas which won't look good when repeated, this can be crevices, stains and objects. -These can later be added on as an overlay/decal. Using an image, we used different tools to edit it and make it into a tiling texture. Simon showed us the healing brushes, patch tools and content aware to 'magically' remove aspects of the image. It was great to see its effects and really shows how much flexibility I have when editing an image. This week we will be focusing on textures. We looked at image manipulation tools in Photoshop. Creating a layer mask & alpha channel as a way to select and adjust the image non destructively. I have never used alpha channels this way and found it super useful. I did not know that there were so many different selection tools in Photoshop and will definitely be using this in future. Note to self: Select > Save Selection. Looking back, I learnt a lot of new things in Photoshop today. Different approaches to finding images and editing textures that we can use for our models. Simon showed us different ways in which we can create tiling textures. The image below shows examples of using the offset tool in Photoshop. As you can see, it rearranges the image so the edges are moved together. In order to make it 'tile' the edges will need to be seamless and the offset tool is the best way to view this. Lastly, we used this texture and saved it as a pattern. A pattern can be used on a new canvas to act as a background to test a texture and ensure it looks seamless when creating a tiling texture. Today, we explored Unity further. Exporting my models from Maya to Unity and to create prefabs. Simon advised it was important to export our models to Unity sooner than later so I can see the proportions of the models. If the scaling is incorrect, it will have to be readjusted in Maya and reexported. I am quite familiar with Unity but todays lesson was a good refresher for me. I also learnt you can snap objects together by holding V + LMB onto a point. Once I exported the meshes to Unity, I looked into grouping them up using an empty game object and creating a prefab (remember to reset the models on the scene to 0,0,0.) A prefab is basically a group that is saved to the projects folder and can be used to 'paste' into the scene. This can really save a lot of time. I got to play around in Unity for a bit, adding colliders and using a first person controller and move around in the level. At the end of the day, I asked Simon if he could have a look at the models I created so far in Maya for my tube station. I was unsure on what sort of approach/method I should use to cap or fill a hole that connects the platform to the tunnel. Simon gave me numerous ways to do this and explained that it was fine to keep the objects separate to save polygons. Additional advice was that the platform needed more edges as it was still very jaggy and also to add bevels on right angles to make them soother and to avoid render issues that causes shimmering. I will take this into consideration when developing my platform. I got to start modelling a scene of an underground bunker using images provided. It is a good idea to know the proportions and and size of the objects when modelling-especially for my Morpheus project as I will need to export my models to Unity so it has to scale with the first person controller that Unity provides. To do this, I used a model of a human figure from Maya as a guide to get my scale correctly. After blocking out the scene with some simple shapes, Simon showed us how to add materials to the meshes and export them to Unity. I had an issue where I couldn't see the texture on the mesh when I assigned it, turns out I had to click on the show texture icon in the panel toolbar. Throughout the week, I will be learning about textures and eventually exporting it to Unity for our Morpheus project. Simon showed us the different tools we will be using such as the UV panel and the hypershade tool in Maya. After lesson, I continued with some modelling. Modularity is a very useful thing to know when becoming a 3D artist. It is a way to reproduce assets very quickly, and most games use this technique. Modular modelling can be in the form of models, textures and materials. Simon also talked about draw calls/culling/batching, which is a technique used in games to load & render data. The example scene Simon showed us was a camera-based draw call where parts of the level was not rendered if the camera was not facing it. This optimises performance and can only work when it is pieced together using modular modelling. To create variety in the levels, creators would create overlays/decals which is placed on top of models. We looked at two different scenes in Unity that show examples of two different modelling methods. One optimal, the other not-so-much. It is advised to model using the grid in Maya, snapping to the grid make it cleaner. In the afternoon, I spoke to Simon about my Art Bible idea and received some useful feedback. I wasn't quite sure on how ambitious I should be considering the amount of time I had but Simon advised I can add more to my scene as most of it is modular so it shouldn't take too long. Simon didn't really like my hotel corridor concept but suggested I start the scene in the tunnel area of the tube as my whole level is basically a big corridor. I agreed with most of what Simon said. I want to focus on the lighting for my project as I feel that different lights can create and accentuate the atmosphere I want to portray. Some of the points mentioned about my art bible was:
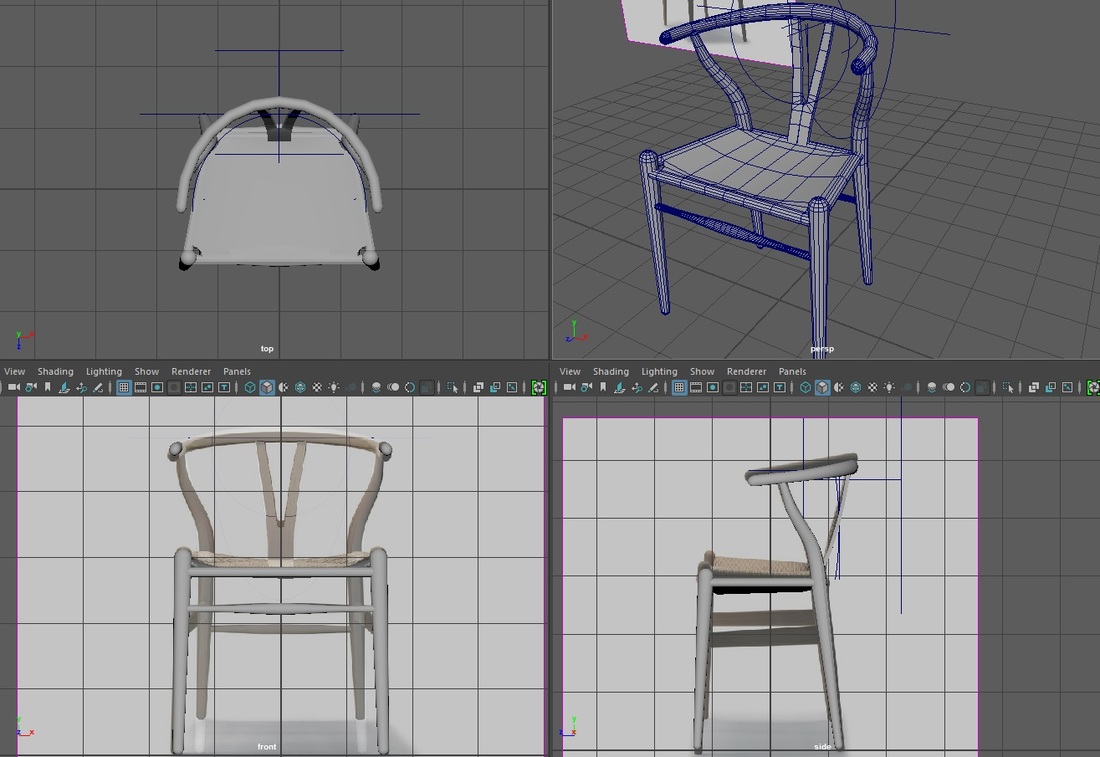
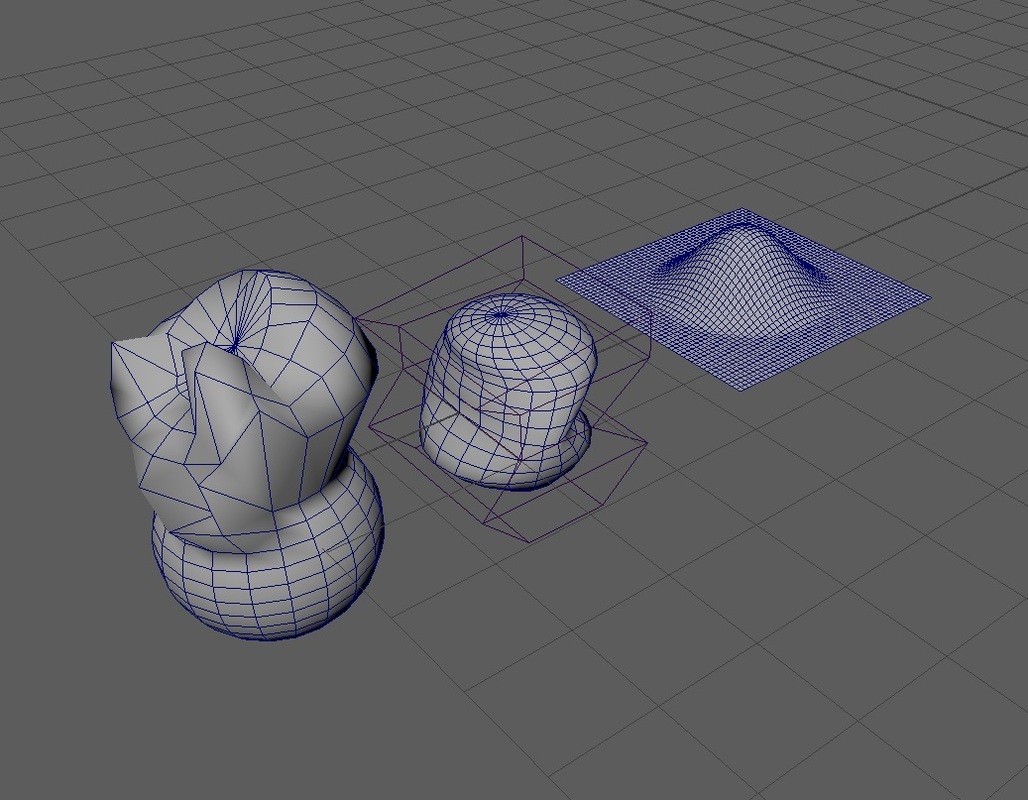
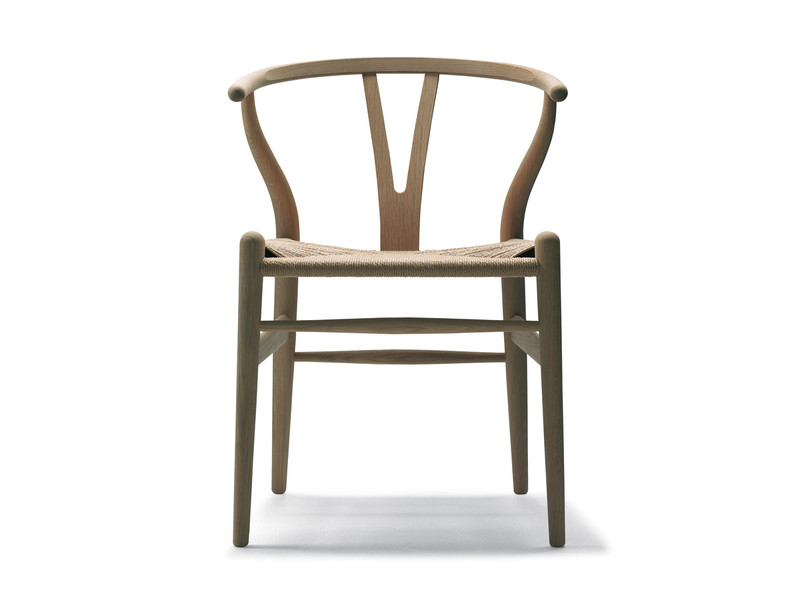
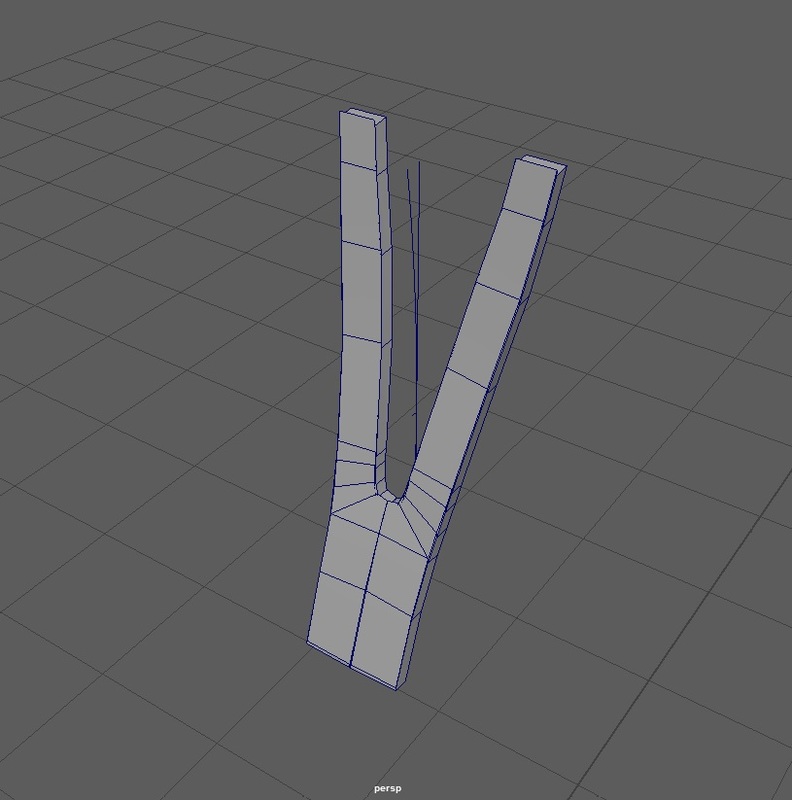
-70s-90s bit of a stretch. Maybe focus on 1970s and think of possible posters/set dressings/assets that would appear during that period. -Possible starting point - In the tunnels. In front of a train. (crash) Whats the narrative. Why was it abandoned. -Expand on the play area, tunnel leading to the platform. Will be modular so shouldn't take too long to create. Find a way for player to access the platform. (Stairs/objects) -Bigger images to show a better idea of what the area looks like as a whole. Textures to use in final version. -Flashlight attached to first person controller. Explore lights and different effects. Area lights. Wall lights, overhead tube lights. Today we looked at deformers. They are a set of tools that can edit the shape of a mesh. Linear deformers create variations of the same object and to create sophistication in shapes. There are a number of different deformers; Bend, flare, twist, lattice and clusters. We looked in depth at the different options and parameters we can adjust to manipulate the mesh. It was really interesting and it would save me a lot of time than doing this manually by hand. Similar to curves, it is non-destructive meaning I can adjust the settings whenever I feel like it to get the desired form. I used the bend and flare deformers to continue my modelling of the chair from yesterday. We also looked at the brush setting more and using it to smooth out vertices. When two meshes are to be connected to each other, it is a good rule of thumb to move them not too far from each other or it would cause tearing once rendered. Useful shortcut: Ctrl + 1 on selected object to isolate selection. To model the seat of the chair, we looked at using the bridge tool in the modelling toolkit. Other tools we looked at were the Multicut and bevel tool. The Multicut tool is a really powerful tool, it is numerous tools in one. I can create or remove edge loops, slice meshes, create vertices and move it around. You can see the completed chair model in the image below. We continued to explore the many tools in Maya. We were given images of a contemporary chair and had to use numerous techniques to model it. Simon walked us through the different processes to archive the shapes. I created image planes on each panel in Maya, using the images provided as references and to get the right proportions and shapes. A method Simon showed as was using curves as a base for extruding meshes from. It was really useful and I used this to create the bend on the back of the chair, I was also able to manipulate the curve by adjusting the points after extruding the mesh which is really useful and non-destructive. (Hold D + C to snap the pivot to the curve) Throughout this tutorial, Simon also introduced us to the modelling toolkit which is a window that contains all the tools needed to model rather than going from the toolbar and finding the same tool in the menus. We looked briefly at the different selection types such as soft selection and selection constraints. -This can also be accessed by using the selection toolbar on the left side. Simon mentioned something I found quite important during the class which I want to put down here. Rules of modelling for Video Games: 1. Ensure an object is combined 2. Named clearly and following company guidelines 3. Pivot is correctly placed -on the ground or centre. We continued to model the chair throughout the day. I modelled the back piece of the chair as seen in the 3rd image. I created half of the model and used the 'mirror geometry' function to duplicate and merge it together. Lastly, I used nurb primitives to loft a cylinder to create the bridge piece between the legs as seen in the last image below. |
AuthorWrite something about yourself. No need to be fancy, just an overview. ArchivesCategories |


 RSS Feed